Here's my FINAL Out Comes.
Here is my final outcomes, for the Environment project.
This particular page is my edits and how they look together as a whole and how I progressed.
I am thoroughly happy with my results, also I am rather impressed by the way they look and how quirky they are.
I thought that the editing stage, was rather complex and difficult to perfect. Although I finally got the hang of it and I kept on trying to make every little detail as interesting as possible This for me, was a challenging concept but I was amazed when they turned out right, I was overwhelmed and so happy. I like that the concept for this was exactly what I was trying to achieve and my imaginative idea came across successfully My techniques for this part of the first project was really effective and I will know now how to do these for the future. I will know now how to correctly mask images onto another image, which I am quite happy about.
Below I present my FINAL images and then, below that, is some little techniques of how I made these images possible:

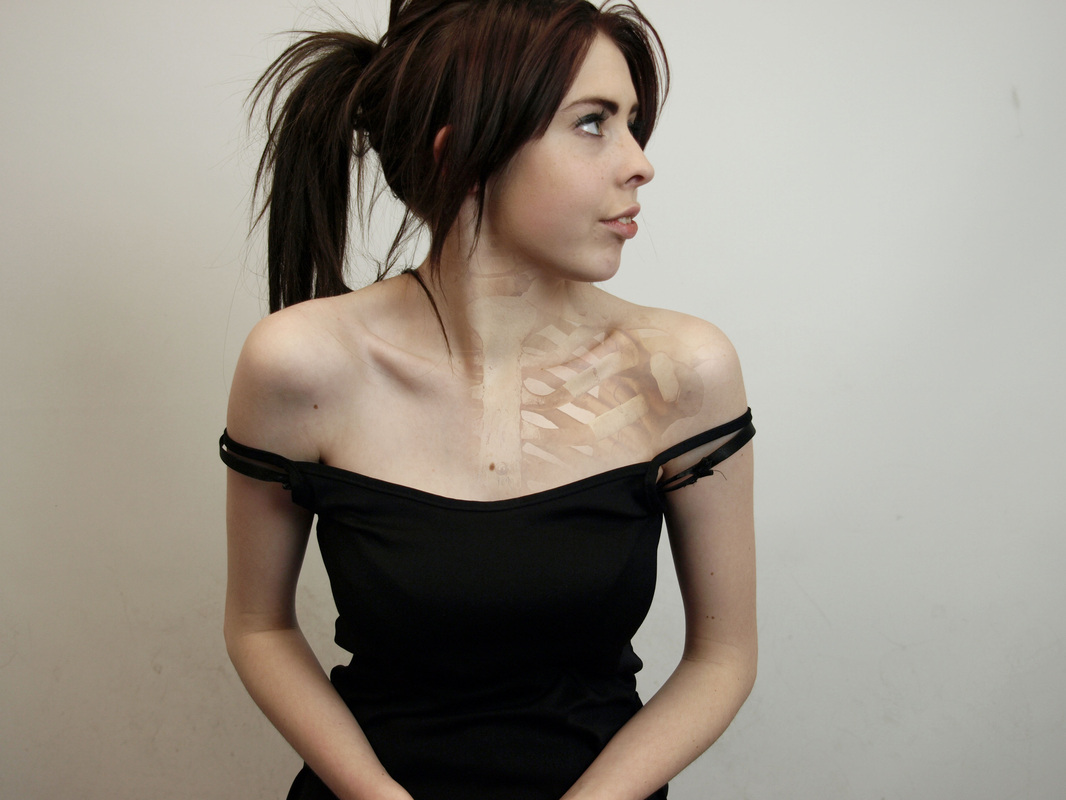
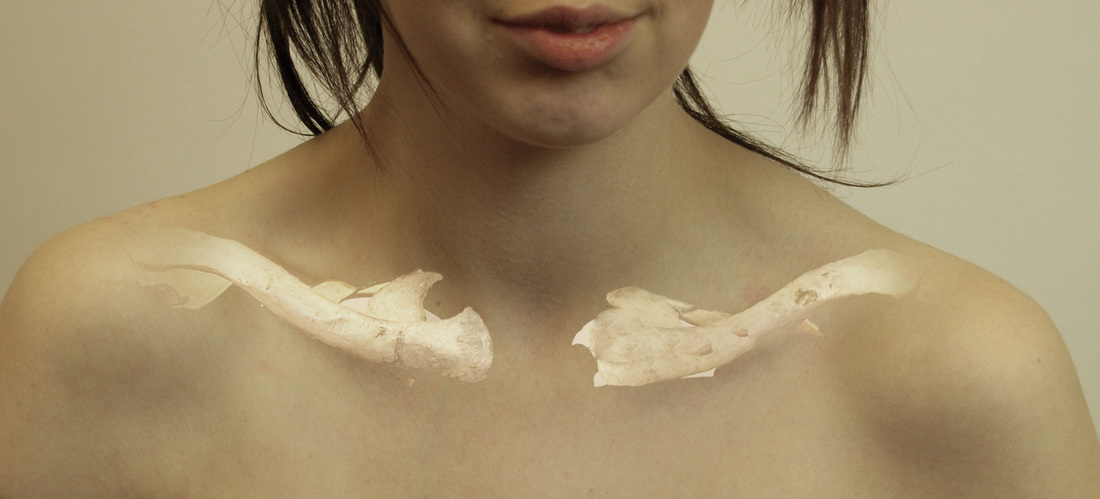
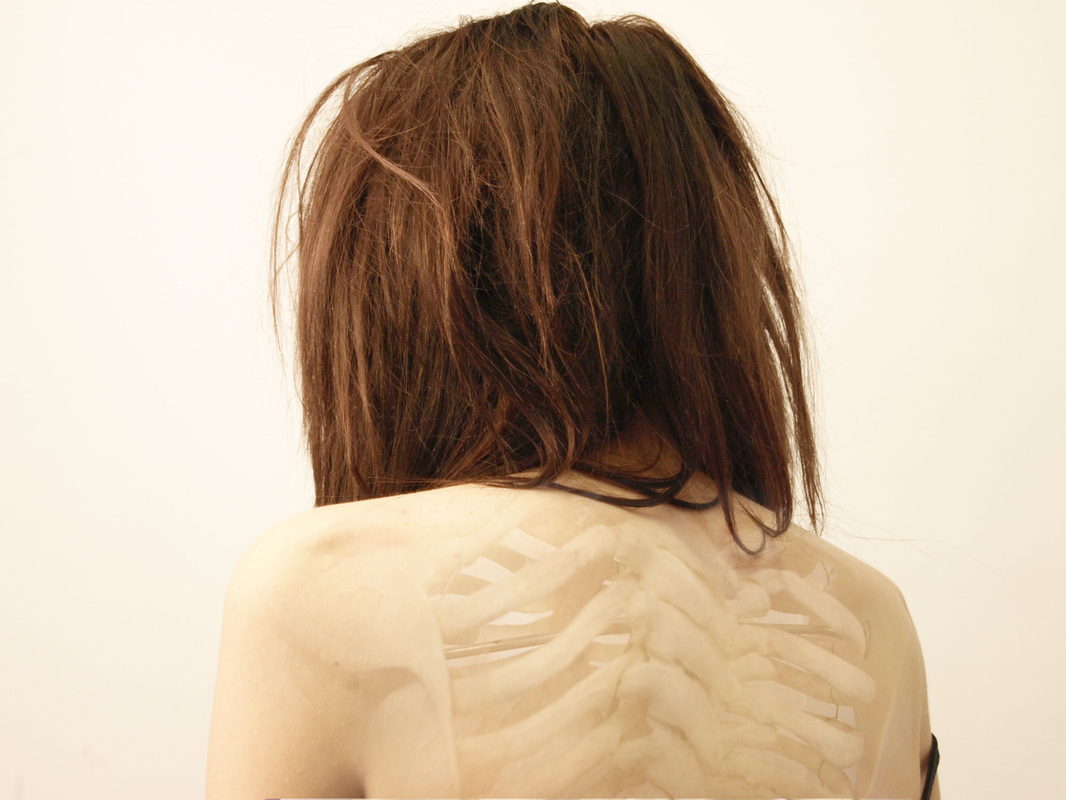
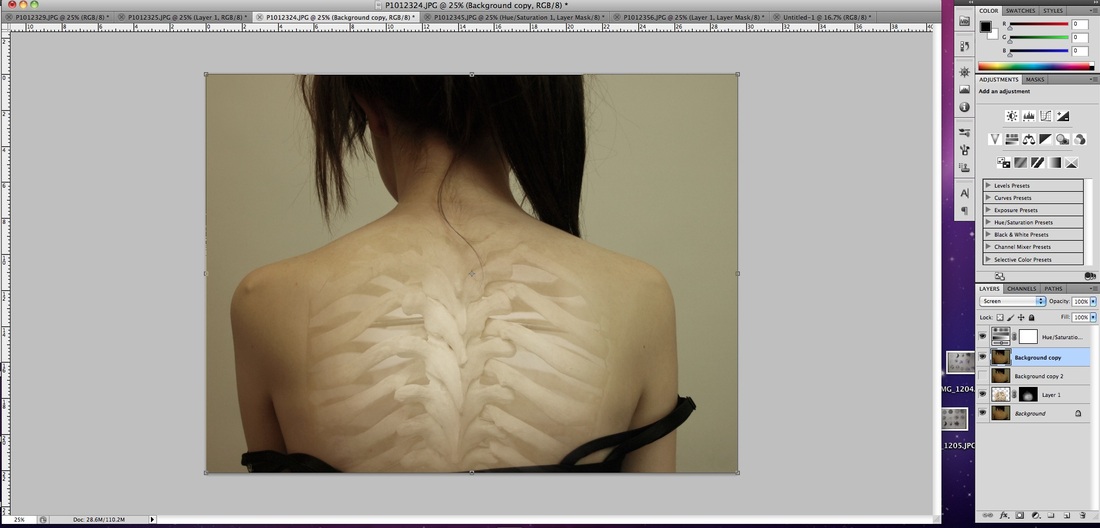
Above:
For this particular image I had to open up my desired model photograph then add in my other desired and correct bone image. I had to make two other copies of the background and only use one layer for my bone image, I was a little confused during this process but I understood it in the long run. Then I made the 'Background Copy 2' layer in Screen mode and the other layers still in normal. For my bones layer I had to use the mask tool and I had to paint it black using the 'Paint Bucket Tool', after this you click back onto the background layer. Then I went onto the brush tool and put it to white and painted over the back of my model, thus creating the bone effected back.
For this particular image I had to open up my desired model photograph then add in my other desired and correct bone image. I had to make two other copies of the background and only use one layer for my bone image, I was a little confused during this process but I understood it in the long run. Then I made the 'Background Copy 2' layer in Screen mode and the other layers still in normal. For my bones layer I had to use the mask tool and I had to paint it black using the 'Paint Bucket Tool', after this you click back onto the background layer. Then I went onto the brush tool and put it to white and painted over the back of my model, thus creating the bone effected back.
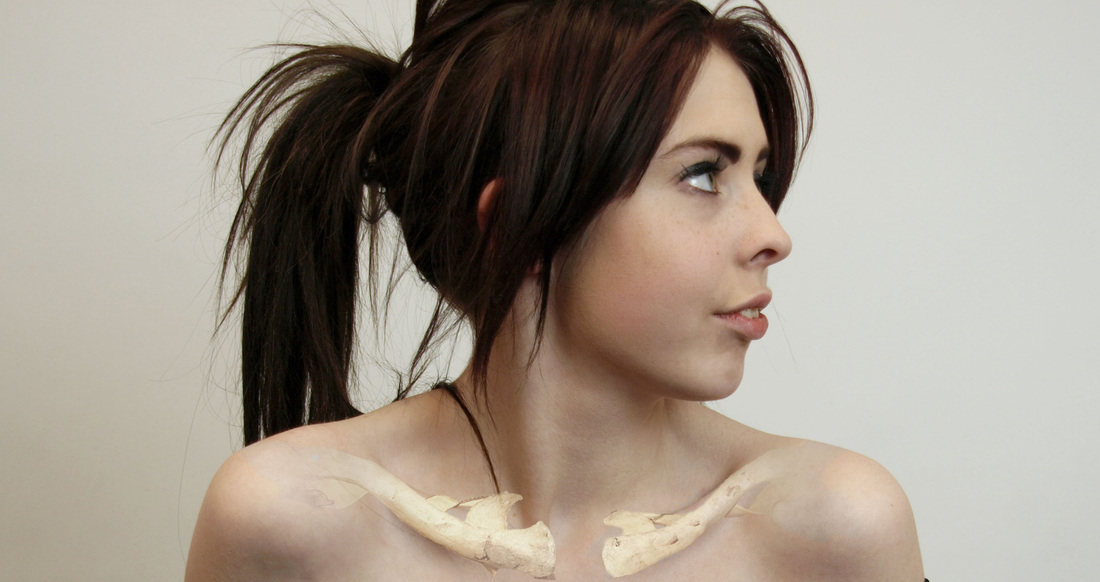
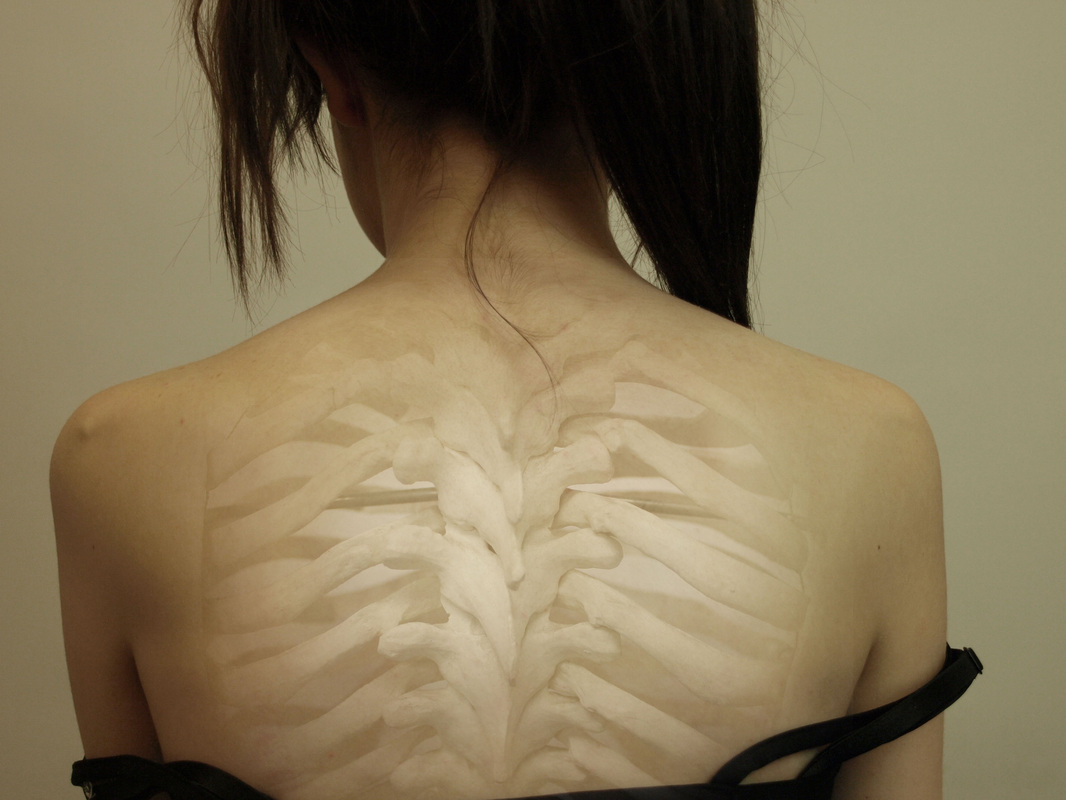
Left:
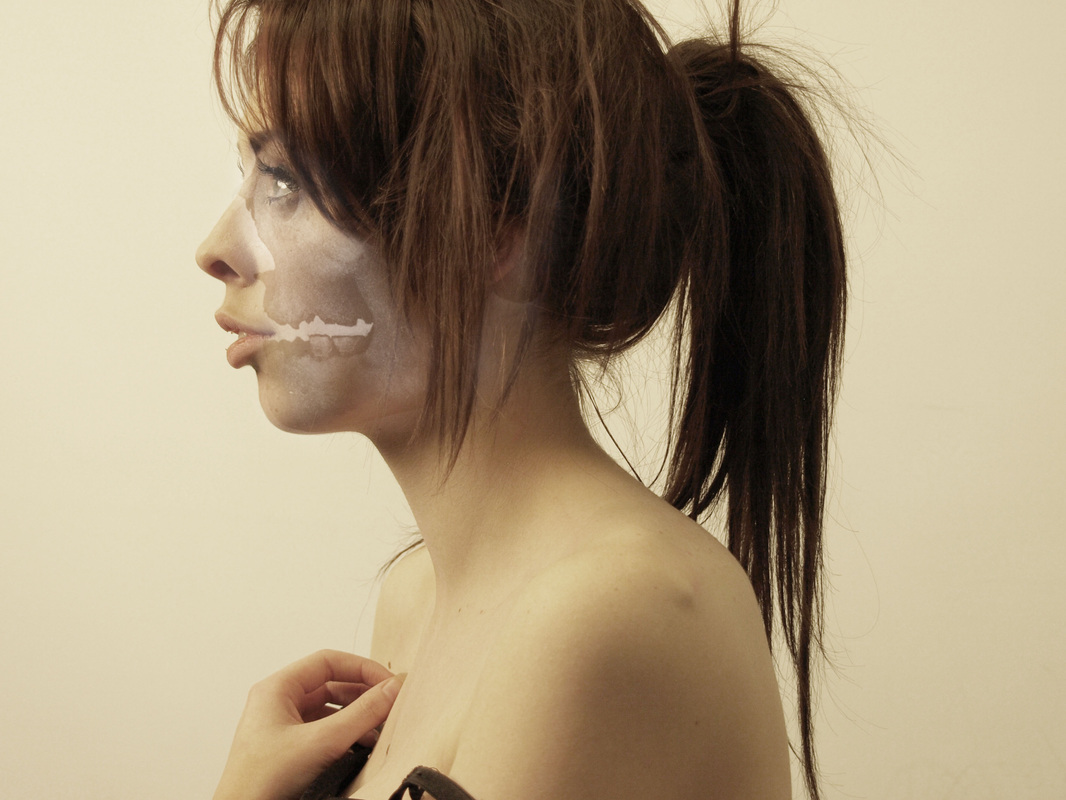
Here I opened up my desired model photograph then add in my other desired and correct skull image. I had to make two other copies of the background and only use one layer for my bone image.. Then I made the 'Background Copy 2' layer into Screen mode and the other layers still in normal. For my skull layer I had to use the mask tool and I had to paint it black using the 'Paint Bucket Tool', after this you click back onto the background layer. Then I went onto the brush tool and put it to white and painted over the back of my model, thus creating the skull as her own. Then in the end after I got the correct editing process, I then added in a hue / saturation tool just to tone down a few major colours, to make this image look more classy with a hint of subtlety.
Here I opened up my desired model photograph then add in my other desired and correct skull image. I had to make two other copies of the background and only use one layer for my bone image.. Then I made the 'Background Copy 2' layer into Screen mode and the other layers still in normal. For my skull layer I had to use the mask tool and I had to paint it black using the 'Paint Bucket Tool', after this you click back onto the background layer. Then I went onto the brush tool and put it to white and painted over the back of my model, thus creating the skull as her own. Then in the end after I got the correct editing process, I then added in a hue / saturation tool just to tone down a few major colours, to make this image look more classy with a hint of subtlety.
Left:
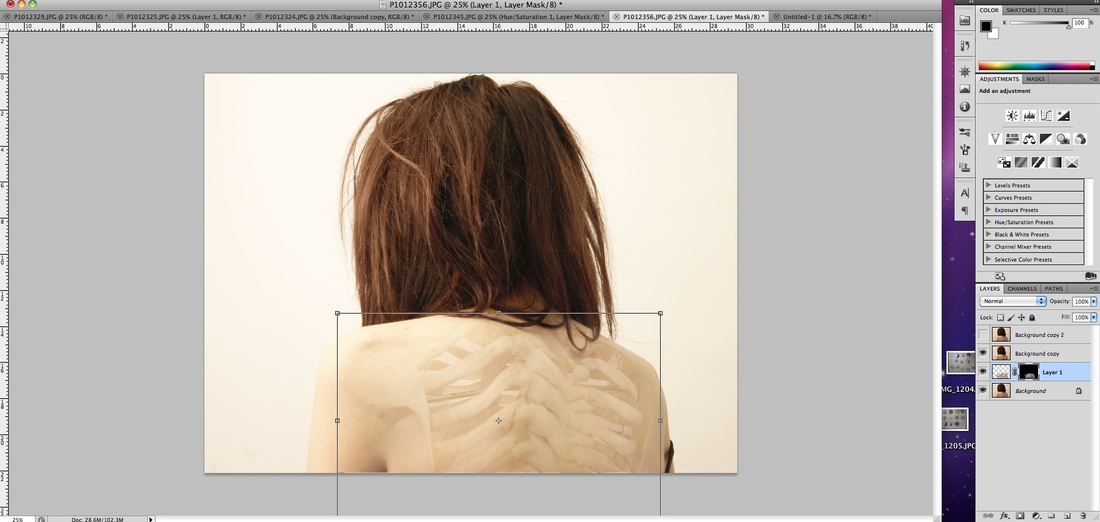
Again, I had opened up my chosen photograph in Photoshop, then copy and pasted my bone image into the window too with the 'CMD and A' task key. I made two copies of my background using one with the Screen mode, and the other in normal. On the side of my photograph you can see where the layers palette is, here is the order in which I edited. At the top of this list is my Hue / Saturation tool, here I had to change the lightness and brightness of this image to get it to it's desired look and effect. Next is the 'background copy' layer in which this has my Screen mode.
Then the background copy 2 layer has been switched off but its mode is on normal, then underneath this is my back bone / spine layer. Here I had to mask off the spine by clicking on the mask tool, which is at the very bottom of the layers palette and is a circle inside a square box. Then I had to click back onto the masked box, then use the paint bucket tool to make this selection black, clicked on the brush tool set to white and went over the back to reveal the bones inside of my model.
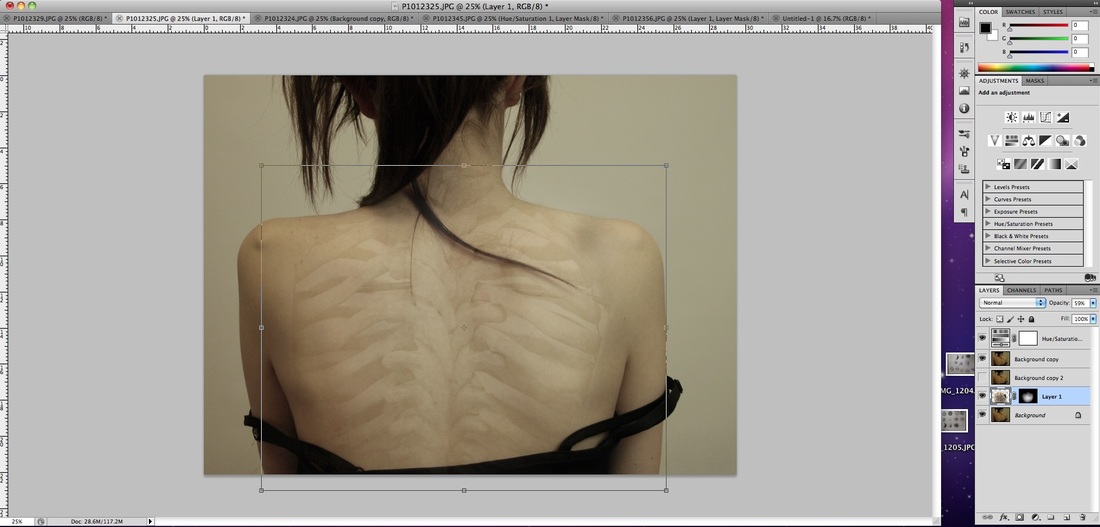
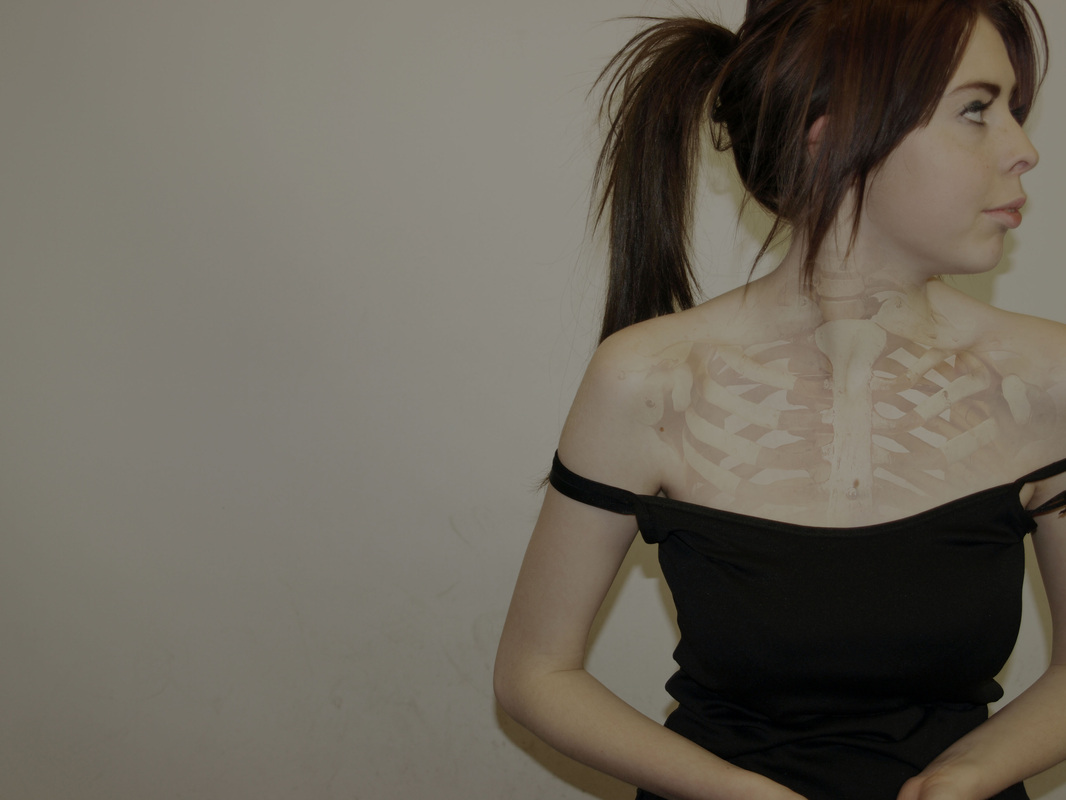
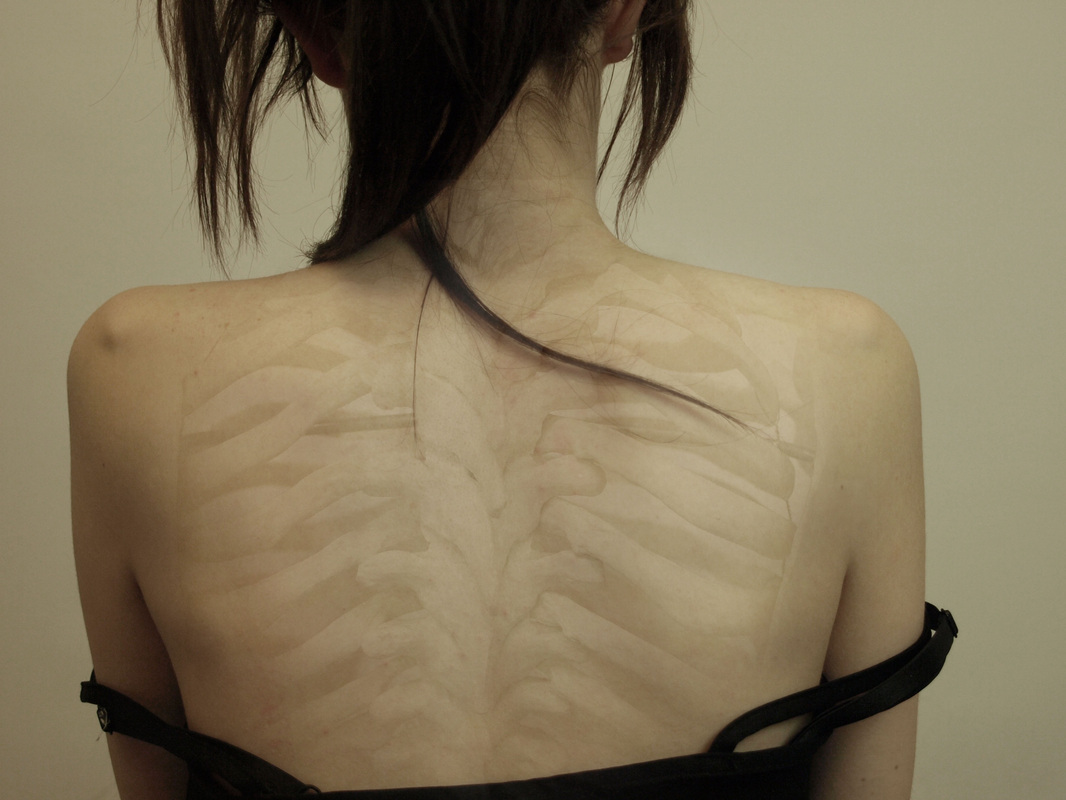
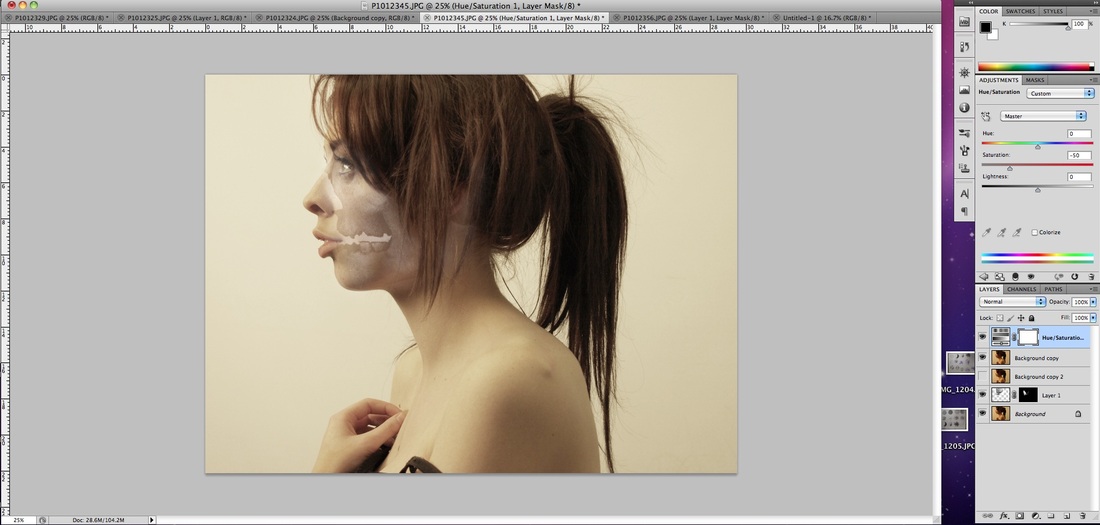
Left:
Here I had opened up one of my images and opened up the same spine / back image. First of all I had to do a hue / saturation onto my image to give it a more dark and eerie effect, which is what I had imagined and wanted. Then clicking onto my background tool, I duplicated it twice, this is because I needed one to be on the screen mode and the others in normal. On the layers palette you can see what layers I have used. Then onto my back / spine photograph I then masked that off and painted the 'mask' part in black with the paint bucket tool. Then I clicked on the brush tool, selected the colour to white then clicked over my image to reveal the back being open. As you can see, again looking at my layers palette, four of the layers are switched on with one being switched off. The reason one is switched off is because if it was on it would give a different colour to the whole image which I didn't want.
Here I had opened up one of my images and opened up the same spine / back image. First of all I had to do a hue / saturation onto my image to give it a more dark and eerie effect, which is what I had imagined and wanted. Then clicking onto my background tool, I duplicated it twice, this is because I needed one to be on the screen mode and the others in normal. On the layers palette you can see what layers I have used. Then onto my back / spine photograph I then masked that off and painted the 'mask' part in black with the paint bucket tool. Then I clicked on the brush tool, selected the colour to white then clicked over my image to reveal the back being open. As you can see, again looking at my layers palette, four of the layers are switched on with one being switched off. The reason one is switched off is because if it was on it would give a different colour to the whole image which I didn't want.
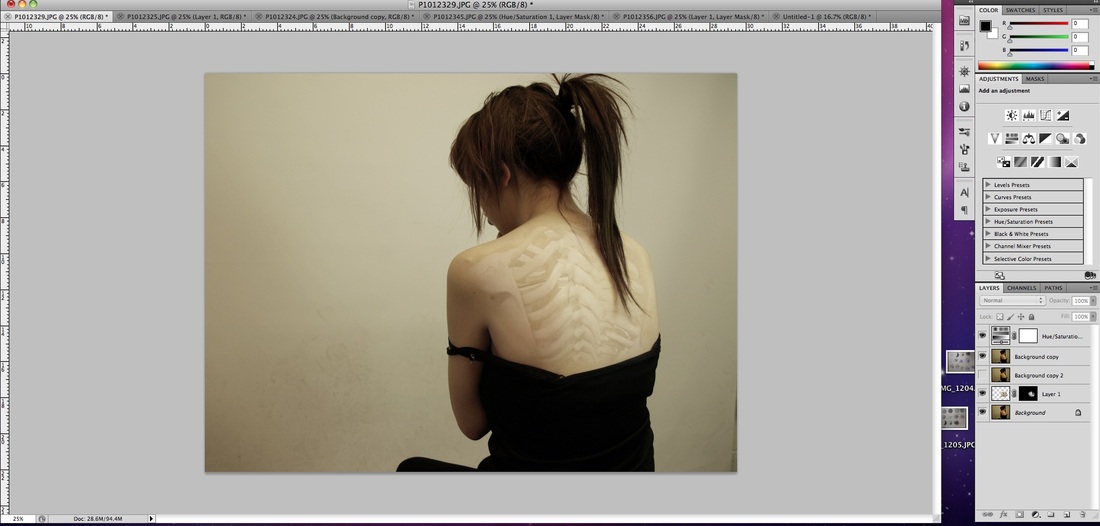
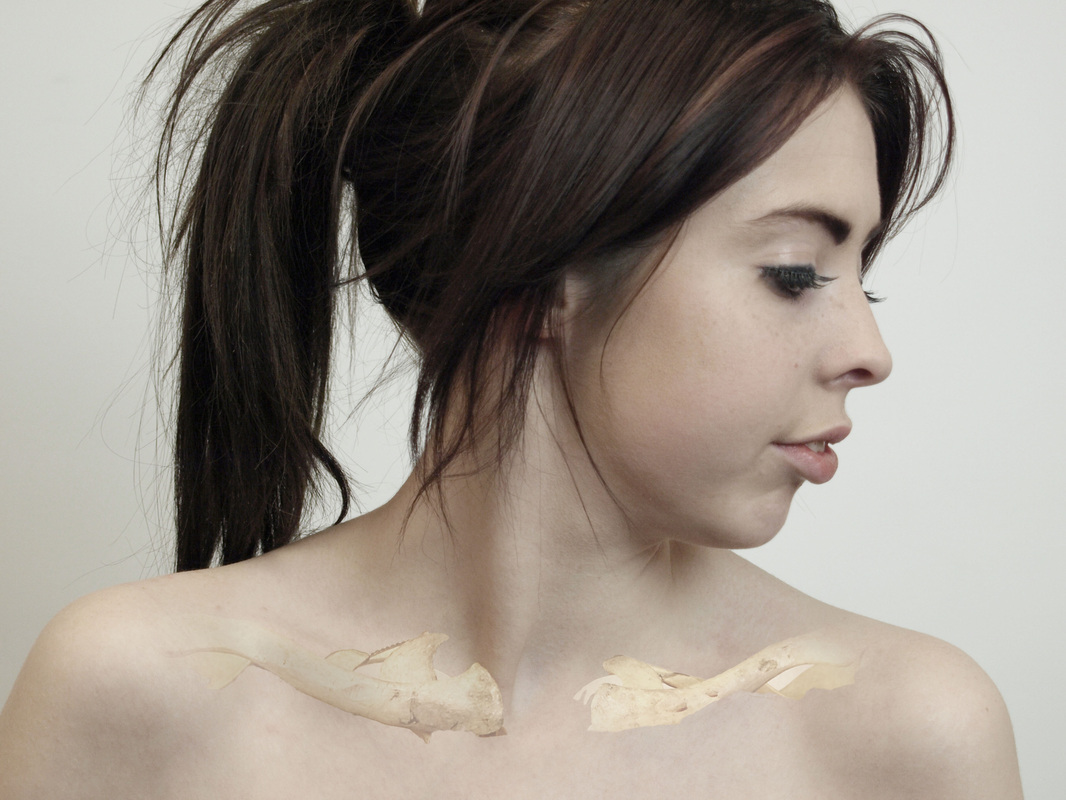
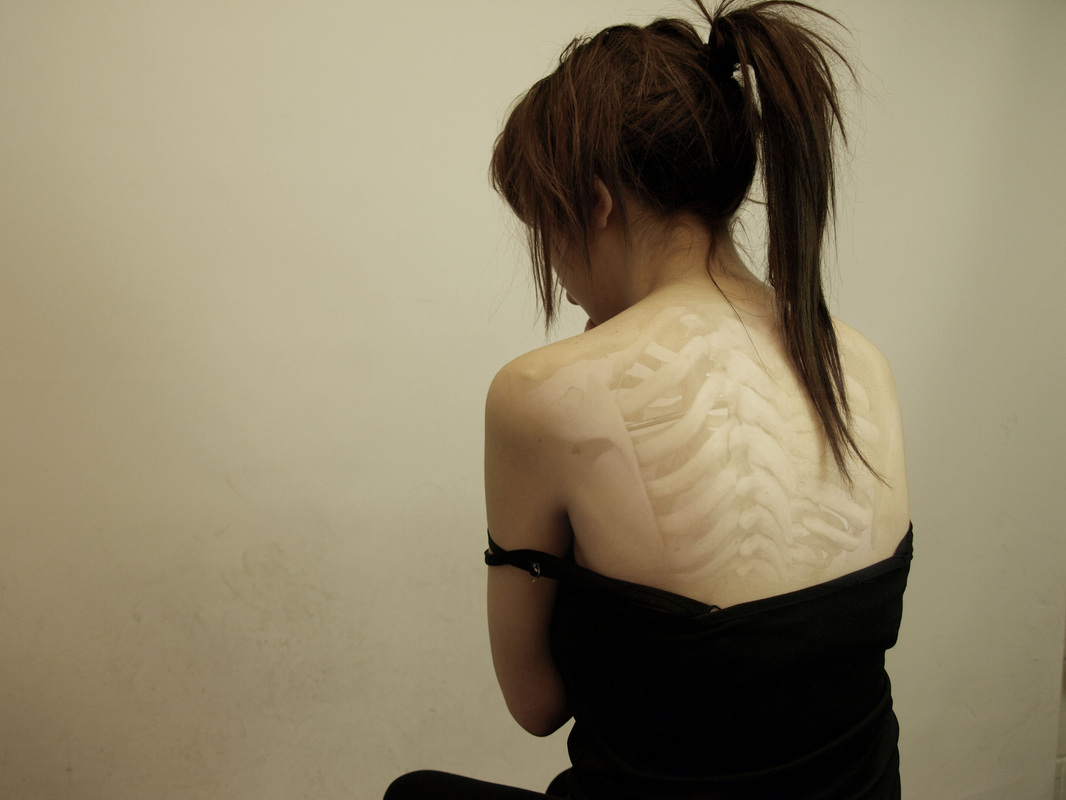
Left:
How I edited this image is exactly the same as before, as I was trying to get the hang of how this advanced technique would work. Here my model is facing to the left with her whole body, I liked this image so I thought it would be great to try as my first experiment. I had to take a separate photograph of the bones then mask them in on Photoshop, this was a technically challenging effect but, I think I pulled it off quite well. When wanting to mask these images off, I had to paint the masked square with black to let my photograph breath and for you to be able to see this effect. I like the way that on this photograph you can see the spine and a bit of the shoulder bone. As again, the layers palette is exactly the same as the previous images, but I had changed how a few was set out.
How I edited this image is exactly the same as before, as I was trying to get the hang of how this advanced technique would work. Here my model is facing to the left with her whole body, I liked this image so I thought it would be great to try as my first experiment. I had to take a separate photograph of the bones then mask them in on Photoshop, this was a technically challenging effect but, I think I pulled it off quite well. When wanting to mask these images off, I had to paint the masked square with black to let my photograph breath and for you to be able to see this effect. I like the way that on this photograph you can see the spine and a bit of the shoulder bone. As again, the layers palette is exactly the same as the previous images, but I had changed how a few was set out.
