Research Task:
Camera Shot types:
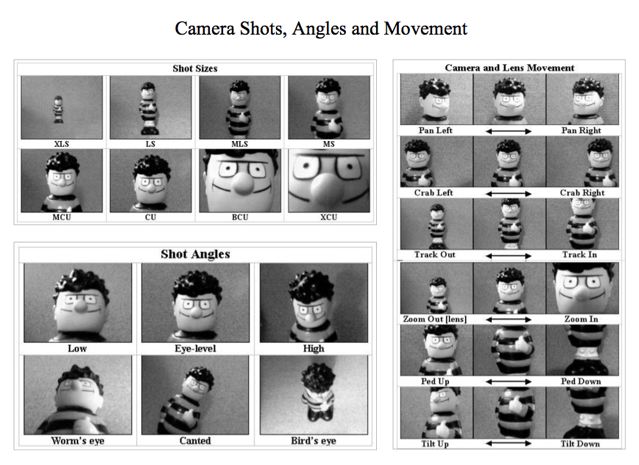
Basic Camera Shot types:
Extreme Wide Shots (EWS):
act to establish the area.
Wide Shots (WS):
show the entire person or area. They’re great for establishing the scene and allow for good action of the characters. Sometimes this is known as the long shot.
Medium Shots (MS):
frame the subject from the waste up. This is the most common shot and allows for hand gestures and motion.
Medium Close Ups (MCU):
shots show the subject in more detail and are often framed from just below the shoulders to the top of the head.
Close Ups (CU):
show a particular part of your subject. For people this usually means the shot frames just the head!
Extreme Close Ups (ECU):
are much tighter close-up shots in which you get detail greater than the human eye might be able to normally perceive. An example of this shot might be of the mouth and eyes together
Advanced Camera Shots:
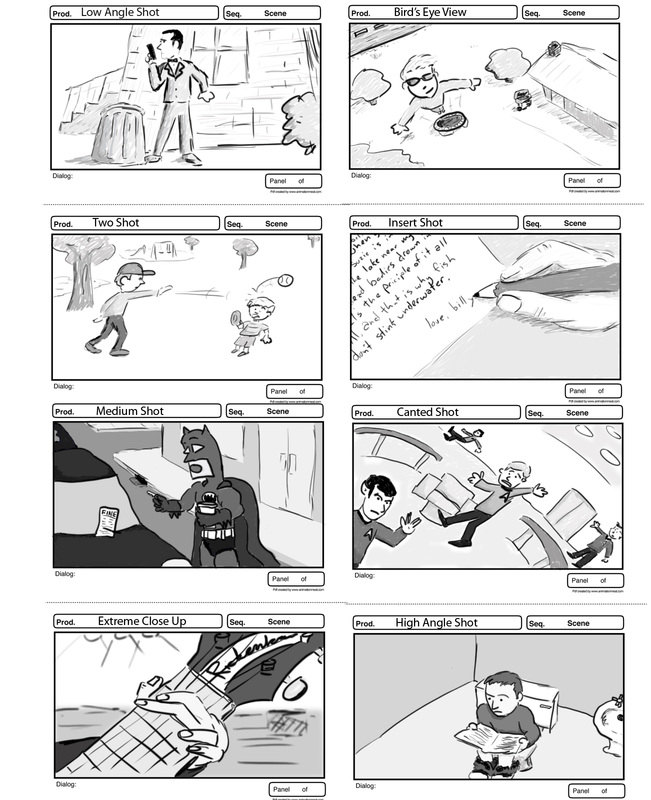
Two Shot:
This is a shot of two peoples (or other individuals) together.
Cut Away (CA):
Cutaways are used in the editing process to fill in footage which is different from the main action. B-roll is often used for cut-aways. An example might be a cut away of a bird singing if the shot is focused on a couple in the woods.
Over the Shoulder Shots (OSS):
are shot from behind the person towards their subject. Generally the frame is cut off just behind the ear, although there are several variations. A good technique to use to get this shot is to frame the person facing the subject with about one third of the frame.
Point of View (POV):
This is an effective shot that gives the audience the feel that you’re seeing it from the eyes of the performer. It is taken from near the eye-level of the actor and shows what he might see. It could be used to give the perspective of other animals too like a frog, a bird, or a fish.
Selective Focus:
By using a large aperture value (f/1.4, f/2.0) you will be able to create a shallow depth of field. This effectively leaves one part of the frame in focus while blurring others, such as the foreground or background. When you change the focus in the shot from the foreground to the background you’re doing another advanced camera shot called a rack focus.
Camera Angles:
Establishing shot:
A shot, normally taken from a great distance or from a "bird's eye view," that establishes where the action is about to occur. In your science-fiction movie, you will probably need an establishing shot of the Paris skyline, most likely one that shows the Eiffel Tower. This will communicate to the audience that the action takes place in Paris.
Long shot:
A shot that shows a scene from a distance (but not as great a distance as the establishing shot). A long shot is used to stress the environment or setting of a scene. In filming your science-fiction movie, for example, you might use a long shot to show the monster causing traffic jams and panicked crowds.
Medium shot:
A shot that frames actors, normally from the waist up. The medium shot can be used to focus attention on an interaction between two actors, such as a struggle, debate, or embrace.
Over-the-shoulder shot:
A shot of one actor taken from over the shoulder of another actor. An over-the-shoulder shot is used when two characters are interacting face-to-face. Filming over an actor's shoulder focuses the audience's attention on one actor at a time in a conversation, rather than on both.
Close-up:
A shot taken at close range, sometimes only inches away from an actor's face, a prop, or some other object. The close-up is designed to focus attention on an actor's expression, to give significance to a certain object, or to direct the audience to some other important element of the film. In your monster movie, you might use a close-up of the monster's teeth or claws to show how ferocious it is, or decide to zoom in on a frightened passerby to illustrate his or her fear.
Framing Shots and Rule of Thirds:
Proper framing:
The first thing to learn is how to frame your subject. If you’re a still photographer you’ll already know about the rule of thirds. This works for filmmaking as well.
The rule of thirds:
This is a general principle in photography, which is generally considered to make shots more appealing to the eye. One can easily visualize this rule by taking a frame and dividing the horizontal piece into three equal sections and dividing the vertical in three equal sections. This creates 9 equal sections. Where these sections meet are four points on the frame. By aligning the central object into these points of the frame (often called the power points), instead of centering the object, you get more aesthetically and professional-looking shots.
However, we should note that while we describe this as the RULE of thirds, it might better be used as a guideline.
Common uses of this rule in video are:
Framing an interview:
The eyes of your subject should fall in one of the upper powerpoints and the subject should be looking towards the empty space on the frame.
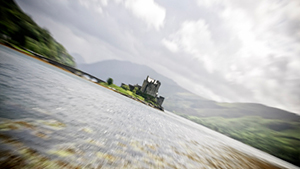
Shooting a horizon:
Rather than position the horizon on the center of the frame, align it along the upper or lower third depending on what you want to emphasize. For example, if you’re shooting a cloud time-lapse you will want two-thirds of the shot centered on the sky.
The first thing to learn is how to frame your subject. If you’re a still photographer you’ll already know about the rule of thirds. This works for filmmaking as well.
The rule of thirds:
This is a general principle in photography, which is generally considered to make shots more appealing to the eye. One can easily visualize this rule by taking a frame and dividing the horizontal piece into three equal sections and dividing the vertical in three equal sections. This creates 9 equal sections. Where these sections meet are four points on the frame. By aligning the central object into these points of the frame (often called the power points), instead of centering the object, you get more aesthetically and professional-looking shots.
However, we should note that while we describe this as the RULE of thirds, it might better be used as a guideline.
Common uses of this rule in video are:
Framing an interview:
The eyes of your subject should fall in one of the upper powerpoints and the subject should be looking towards the empty space on the frame.
Shooting a horizon:
Rather than position the horizon on the center of the frame, align it along the upper or lower third depending on what you want to emphasize. For example, if you’re shooting a cloud time-lapse you will want two-thirds of the shot centered on the sky.

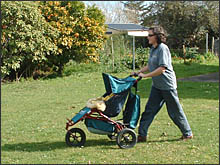
Crossing the line (Reverse Cut):
- Crossing the line is a very important concept in video and film production. It refers to an imaginary line which cuts through the middle of the scene, from side to side with respect to the camera. Crossing the line changes the viewer's perspective in such as way that it causes disorientation and confusion. For this reason, crossing the line is something to be avoided.
|
- In this example the camera is located to the subject's left. The imaginary line is shown in red.
- The resulting shot shows the subject walking from right to left, establishing the viewer's position and orientation relative to her. |
|
|
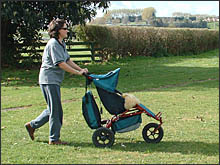
- In this example the camera is located to the subject's left. The imaginary line is shown in red.
- The resulting shot shows the subject walking from right to left, establishing the viewer's position and orientation relative to her. |
|
- To prevent reverse cuts, set up the scene so you can shoot it all from one side. If you are using multiple cameras, position them on the same side.
- In some cases crossing the line is unavoidable, or at least desirable enough to be worth the awkward transition. In this case you can minimize confusion by using a shot taken on the line itself to go between the shots, as illustrated below. This "buffer" shot guides the viewer to the new position so they know where they are. Although it's still not perfect, it's not such a severe jolt.
- In some cases crossing the line is unavoidable, or at least desirable enough to be worth the awkward transition. In this case you can minimize confusion by using a shot taken on the line itself to go between the shots, as illustrated below. This "buffer" shot guides the viewer to the new position so they know where they are. Although it's still not perfect, it's not such a severe jolt.
Dutch Tilt:
- A Dutch tilt is a camera shot in which the camera angle is deliberately slanted to one side. This can be used for dramatic effect and helps portray unease, disorientation, frantic or desperate action, intoxication, madness, etc. A dutch tilt can be a static shot, or used with simultaneous panning, tilting and / or zooming.
Other Terminology:
- The Dutch tilt is also known as Dutch angle, German angle, oblique angle, canted angle and even theBatman angle.
Etymology:
- The Dutch tilt was used a lot in German films of the 1930s and 1940s. This is where the name German angle came from. The Dutch term is said to have been a mistranslation of the German Deutsch.